✅ Source Code Blocks
Source code blocks are the foundation of literate programming in org-mode. They allow you to embed executable code within your documents, creating notebooks that combine narrative text, code, and results.
This guide covers everything you need to know about working with source blocks in Scimax VS Code.
✅ Introduction to Literate Programming
Literate programming, pioneered by Donald Knuth, is a programming paradigm that treats programs as works of literature. Instead of writing code with comments, you write documentation with embedded code.
✅ Benefits of Literate Programming
Documentation and code stay synchronized - Your explanations live alongside
Better understanding - Force yourself to explain your reasoning
Reproducible research - Combine analysis, code, and results in one document
Exploratory programming - Test ideas interactively like a notebook
Multiple outputs from one source - Tangle code files and export documentation
✅ Literate Programming in Org-Mode
Org-mode's Babel system brings literate programming to org documents:
Write code in source blocks with full syntax highlighting
Execute blocks and capture results inline
Pass data between blocks in different languages
Extract (tangle) code to external files
Include or exclude code/results in exports
✅ Source Block Syntax
✅ Basic Structure
A source block begins with #+BEGINSRC and ends with #+ENDSRC:
print("Hello, world!")Hello, world!
✅ Language Declaration
The language comes immediately after #+BEGINSRC:
# Python code here// JavaScript code here# Shell commands here✅ Header Arguments
Header arguments control block behavior and appear after the language:
# This block prints results and uses a persistent session✅ Results Section
When you execute a block, results appear immediately below in a #+RESULTS: section:
print(2 + 2)4
✅ Executing Code
✅ Execution Keybindings
| Keybinding | Action | Platform |
| ----------------------------+------------------------------------- | ---------- | |
| C- | Execute current block | All |
| C-c C-c | Execute current block (Emacs style) | All |
| S- | Execute and move to next block | All |
✅ Execution Commands
| Command | Key Binding | Description |
|---|---|---|
| scimax.org.executeBlock | C-c C-c | Execute the current source block |
| scimax.ob.executeAndNext | S-Enter | Execute and jump to next block |
| scimax.ob.executeAndNew | M-S-Enter | Execute and new |
| scimax.ob.executeToPoint | Execute all blocks up to cursor | |
| scimax.org.executeAllBlocks | Execute all blocks in document |
✅ Execution Flow
Place cursor inside a source block
Press C-
(or s- on Mac) Code executes using the appropriate language interpreter
Results appear below the block in a #+RESULTS: section
Previous results are replaced automatically
✅ Example
import math
result = math.sqrt(16)
print(f"The square root of 16 is {result}")
The square root of 16 is 4.0
✅ Supported Languages
Scimax VS Code supports a wide range of programming languages through both direct execution and Jupyter kernel integration.
✅ Direct Execution Languages
These languages execute directly without requiring Jupyter:
| Language | Identifiers | Requirement |
|---|---|---|
| Python | python, python3, py | Python 3.x in PATH |
| JavaScript | javascript, js, node | Node.js installed |
| TypeScript | typescript, ts | TypeScript installed |
| Shell/Bash | sh, bash, shell | Bash shell |
| SQL | sql, sqlite | Database configured |
✅ Jupyter Kernel Languages
For enhanced interactive features, use Jupyter kernels by prefixing the language with jupyter- or relying on automatic Jupyter detection:
| Language | Explicit Syntax | Auto-Detect | Kernel Required |
|---|---|---|---|
| Python | jupyter-python | Yes | ipykernel |
| R | jupyter-r | Yes | IRkernel |
| Julia | jupyter-julia | Yes | IJulia |
| Ruby | jupyter-ruby | Yes | iruby |
| Go | jupyter-go | No | gophernotes |
| Rust | jupyter-rust | No | evcxr |
| Perl | jupyter-perl | No | IPerl |
| C | jupyter-c | No | jupyter-c-kernel |
| C++ | jupyter-cpp | No | xeus-cling |
| Java | jupyter-java | No | IJava |
✅ Jupyter Benefits
Using Jupyter kernels provides:
Persistent state - Variables persist between executions in the same session
Rich output - Display plots, images, HTML, and LaTeX
Interactive widgets - Use ipywidgets and similar libraries
Automatic display - Images from matplotlib, plots, etc. appear automatically
✅ Example: Mixing Languages
echo "System: $(uname -s)"System: Darwin
import platform
print(f"Python version: {platform.python_version()}")
Python version: 3.12.11
console.log(`Node version: ${process.version}`);Node version: v25.2.1
✅ Header Arguments
Header arguments customize how source blocks execute and how results are handled. They appear after the language name.
✅ Syntax
print(arg1, arg2)value1 5
✅ Results Arguments
✅ :results - Control Output Format
The :results argument controls how execution results are formatted and displayed.
✅ Collection Types
| Value | Description |
|---|---|
| output | Capture stdout/stderr (default for most) |
| value | Capture return value (last expression) |
✅ Format Types
| Value | Description |
|---|---|
| table | Format output as an org table |
| list | Format output as a list |
| verbatim | Fixed-width verbatim text (default) |
| file | Result is a file path/link |
| html | Wrap in #+BEGINEXPORT html block |
| latex | Wrap in #+BEGINEXPORT latex block |
| drawer | Wrap in :RESULTS: drawer |
✅ Handling Types
| Value | Description |
|---|---|
| replace | Replace previous results (default) |
| append | Append to previous results |
| prepend | Insert before previous results |
| silent | Don't insert results |
✅ Examples
print("Line 1")
print("Line 2")
Line 1 Line 2
42print("Name,Age,City")
print("Alice,30,NYC")
print("Bob,25,Boston")| Name | Age | City |
| Alice | 30 | NYC |
| Bob | 25 | Boston |
import matplotlib.pyplot as plt
plt.plot([1, 2, 3], [1, 4, 9])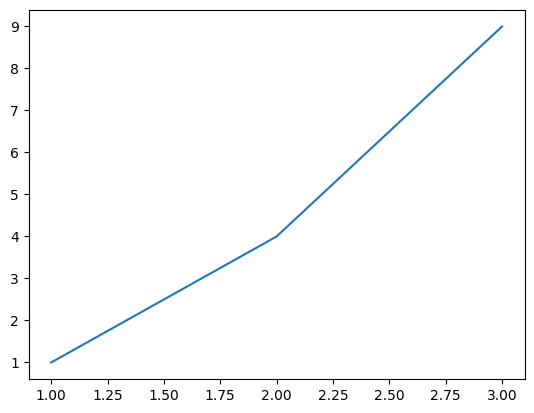
✅ Export Arguments
✅ :exports - Control What Gets Exported
| Value | Description |
|---|---|
| code | Export only the code block |
| results | Export only the results |
| both | Export both code and results (default) |
| none | Don't export anything |
# Only this code appears in PDF/HTML export
print("Secret result")✅ Variable Arguments
✅ :var - Pass Variables to Code
Define input variables for the code block:
print(f"{name} is {age} years old")Alice is 30 years old
Multiple variables:
result = x + y
print(f"{x} + {y} = {result}")40 + 20 = 60
Reference named blocks or tables:
| Name | Score |
|---|---|
| Alice | 95 |
| Bob | 87 |
for row in data:
print(f"{row[0]}: {row[1]}")✅ Session Arguments
✅ :session - Enable Stateful Execution
Use sessions to maintain state between block executions:
x = 42
print("x defined")x defined
print(f"x = {x}")x = 42
Session names:
:session - Use default session for this language
:session name - Use named session
:session none - Disable session (each block is isolated)
✅ Directory Arguments
✅ :dir - Set Working Directory
Execute code in a specific directory:
pwd/private/tmp
import os
print(os.getcwd())/Users/jkitchin/Dropbox/projects/scimax_vscode/.github
✅ Tangling Arguments
✅ :tangle - Extract Code to Files
Control whether code is extracted during tangling:
| Value | Description |
|---|---|
| no | Don't tangle this block (default) |
| yes | Tangle to default file |
| filename.ext | Tangle to specific file |
def helper_function():
"""This function will be extracted to utils.py"""
return "helper"from utils import helper_function
def main():
print(helper_function())
if __name__ == "__main__":
main()Use `C-c C-v t' to tangle all blocks in the document.
✅ Cache Arguments
✅ :cache - Cache Execution Results
Cache results to avoid re-execution:
| Value | Description |
|---|---|
| no | Don't cache (re-execute each time) |
| yes | Cache results (only re-execute if code changes) |
import time
time.sleep(5) # Expensive operation
result = 42
print(result)42
On first execution, this waits 5 seconds. On subsequent executions, the cached result is used instantly (unless the code changes).
✅ Other Useful Arguments
✅ :eval - Control Evaluation
| Value | Description |
|---|---|
| yes | Evaluate normally (default) |
| no | Never evaluate |
| query | Ask before evaluating |
ls | head -n2_minted _static
ls | head -n2✅ :wrap - Wrap Results in Block
Wrap results in a custom block:
print("This will be wrapped in a quote block")This will be wrapped in a quote block
✅ :prologue and :epilogue - Code Injection
Add code before/after the main block code:
print(sys.version)3.12.11 (main, Jun 12 2025, 12:22:42) [Clang 20.1.4 ] Done
✅ :cmdline - Command Line Arguments
Pass arguments to the interpreter:
# Shell script runs with -x flag (print commands)
echo "Hello"Hello
✅ Combining Arguments
Arguments can be combined:
import pandas as pd
df = pd.read_csv('data.csv')
print(df.head())1 2 3 0 4 5 6
✅ Results Handling and Output Types
✅ Automatic Result Insertion
When you execute a block, results automatically appear below it in a
✅ Result Types by Language
✅ Text Output (Verbatim)
Most languages produce text output by default, formatted with : prefix:
print("Hello")
print("World")Hello World
✅ Tables
Python/R code that produces tabular data can be formatted as org tables:
data = [['Alice', 30], ['Bob', 25], ['Carol', 35]]
return data| Alice | 30 |
| Bob | 25 |
| Carol | 35 |
✅ File Links
When using :results file or Jupyter with plotting libraries, results are file links:
import matplotlib.pyplot as plt
plt.plot([1, 2, 3], [1, 4, 9]);
Images are automatically saved to .ob-jupyter/ directory when using Jupyter kernels.
✅ HTML and LaTeX
Blocks can produce rich formatted output:
html = "<h1>Title</h1><p>Paragraph</p>"
print(html)Title
Paragraph
✅ Drawers
Use drawers to fold long output:
for i in range(20):
print(f"Line {i}")Line 0
Line 1
Line 2
Line 3
Line 4
Line 5
Line 6
Line 7
Line 8
Line 9
Line 10
Line 11
Line 12
Line 13
Line 14
Line 15
Line 16
Line 17
Line 18
Line 19
✅ Error Handling
When execution fails, error messages appear in results:
undefined_variableTraceback (most recent call last): File "<string>", line 50, in <module> File "<string>", line 1, in <module> NameError: name 'undefined_variable' is not defined
✅ Clearing Results
| Command | Description |
|---|---|
| scimax.ob.clearResults | Clear results of current block |
| scimax.ob.clearAllResults | Clear all results in document |
| scimax.babel.clearResults | Clear all results in document |
✅ Sessions for Stateful Execution
✅ What Are Sessions?
Sessions maintain a persistent interpreter process that preserves state between executions. This is similar to how Jupyter notebooks work - variables, functions, and imports persist.
✅ Enabling Sessions
Add :session header argument:
x = 42
y = 10
result = x + y
print(result)52
✅ Named Sessions
Use different session names to maintain separate contexts:
import pandas as pd
df = pd.read_csv('data.csv')
import unittest
# Separate session for tests# Can still access df here
print(df.head())✅ Session Scope
Sessions are per-language and per-name
Default session name (when you just use :session) is language-specific
Use :session none to explicitly disable session for a block
Sessions persist for the duration of the VS Code window
✅ Jupyter Sessions
When using Jupyter kernels (e.g., jupyter-python), sessions automatically use Jupyter kernel instances:
import numpy as np
data = np.random.randn(100)
import matplotlib.pyplot as plt
plt.hist(data, bins=20);
✅ Benefits of Sessions
Avoid re-computation - Load data once, use in multiple blocks
Interactive development - Build up code incrementally
Shared context - Split long workflows into logical chunks
Testing - Set up fixtures in one block, test in others
✅ Session Limitations
Sessions consume memory until VS Code closes
Long-running sessions can accumulate stale state
Restart VS Code to clear all sessions
Session state is not saved to disk
✅ Block Manipulation
Scimax VS Code provides powerful commands for creating, modifying, and reorganizing source blocks.
✅ Creating Blocks
✅ Insert Block Above
| Command | Key Binding | Description |
|---|---|---|
| scimax.ob.insertBlockAbove | Esc-a | Insert new block above cursor |
Prompts for language, creates block, and places cursor inside.
✅ Insert Block Below
| Command | Key Binding | Description |
|---|---|---|
| scimax.ob.insertBlockBelow | Esc-b | Insert new block below cursor |
| scimax.ob.insertBlockBelowSame | Insert block with same language |
The "same language" variant copies the language from the current block.
✅ Splitting Blocks
✅ Split at Cursor
| Command | Key Binding | Description |
|---|---|---|
| scimax.ob.splitBlock | Esc-- | Split current block at cursor |
Place your cursor in the middle of a source block and split it into two blocks:
Before:
x = 1
y = 2
z = x + y
print(z)
After splitting at line 3:
#+BEGIN_SRC python
x = 1
y = 2
z = x + y
print(z)Both blocks inherit the original header arguments.
✅ Merging Blocks
✅ Merge with Previous/Next
| Command | Description |
|---|---|
| scimax.ob.mergeWithPrevious | Merge with previous block |
| scimax.ob.mergeWithNext | Merge with next block |
Combines code from two adjacent blocks into one. If languages differ, prompts for confirmation.
✅ Copying and Killing
✅ Clone Block
| Command | Description |
|---|---|
| scimax.ob.cloneBlock | Duplicate current block below |
Creates an exact copy of the current block including its header arguments.
✅ Copy Block and Results
| Command | Description |
|---|---|
| scimax.ob.copyBlock | Copy block and results to clipboard |
Copies the entire block including #+NAME: line (if present) and results section.
✅ Kill Block
| Command | Description |
|---|---|
| scimax.ob.killBlock | Delete block and copy to clipboard |
Removes the block and its results, copying everything to clipboard for pasting elsewhere.
✅ Moving Blocks
✅ Move Up/Down
| Command | Description |
|---|---|
| scimax.ob.moveBlockUp | Swap with previous block |
| scimax.ob.moveBlockDown | Swap with next block |
Swaps the current block (including results) with the adjacent block, maintaining all content.
✅ Typical Workflows
✅ Notebook-Style Development
Insert block with scimax.ob.insertBlockBelow
Write code
Execute with S-
(executes and moves to next) Repeat
✅ Refactoring Code
Split large block into logical pieces with scimax.ob.splitBlock
Add session to maintain state: :session
Execute sequentially to verify
Reorganize with move commands if needed
✅ Experimenting with Variants
Clone block with scimax.ob.cloneBlock
Modify clone to test alternative approach
Compare results
Kill the version you don't want
✅ Inline Source Blocks
Sometimes you need to execute code inline within a paragraph rather than in a standalone block.
✅ Syntax
src_LANGUAGE{CODE}
src_LANGUAGE[HEADERS]{CODE}
✅ Examples
✅ Simple Inline Computation
The answer is src_python{return 2 + 2} {{{results(=4=)}}} which equals 4.
Result after execution:
The answer is 4 which equals 4.✅ With Headers
Today is srcpython[:results value]{import datetime; datetime.date.today()} {{{results(datetime.date(2026, 1, 18))}}}.
✅ Accessing Variables
Inline blocks can access session variables:
You have to run this first to create a session:
total = 100
tax_rate = 0.08
The total with tax is srcpython[:session calc]{return total * (1 + taxrate)} {{{results(=108.0=)}}}.
✅ Use Cases
Embedding calculations in text
Showing dates/times
Inserting computed values into sentences
Quick one-liners that don't need a full block
✅ Limitations
No syntax highlighting
Results replace the inline block (can't keep both)
Less suitable for multi-line code
Harder to debug than regular blocks
✅ Code Tangling
Tangling is the process of extracting source code from your org document into separate source files. This enables the literate programming workflow where documentation is primary but you can still generate working software.
✅ What Is Tangling?
Tangling extracts code from source blocks marked with :tangle into external files:
Write narrative documentation with embedded code blocks
Extract all code to build/run your project
Keep docs and code in perfect sync
✅ Enabling Tangling
Add :tangle filename.ext to source blocks:
#!/usr/bin/env python3

def main():
    print("Hello from tangled code!")

if __name__ == "__main__":
    main()
✅ Tangling Commands
✅ Execute Tangle
| Keybinding | Command | Description |
|---|---|---|
| C-c C-v t | scimax.babel.tangle | Extract all tangle blocks |
This command:
Finds all blocks with :tangle headers
Groups them by target filename
Writes each file with concatenated code
✅ Tangling Modes
✅ Don't Tangle (Default)
# Not tangled by default✅ Tangle to Specific File
def utility_function():
    return "useful"
def another_utility():
return "also useful"Both blocks tangle to src/utils.py in order.
✅ Tangle with Yes
# Tangles to default file (based on org filename)If your org file is project.org, this tangles to project.py.
✅ Advanced Tangling
✅ No-Web Style References
Use :noweb to reference other named blocks:
<<imports>>
<<helpers>>

def main():
    print(helper())
When tangled, and are replaced with the code from those named blocks.
✅ Shebang Lines
Add :shebang for executable scripts:
echo "This will be executable"✅ Comments in Tangled Code
By default, tangled code includes no comments about its origin. Some implementations add comments like:
# [[file:literate.org::*Section Name][Section Name:1]]
# code here
# Section Name:1 ends here
✅ Use Cases
✅ Library Development
Write a tutorial document that tangles to a working library:
README.org - Document with examples
Tangle to src/lib.py, tests/testlib.py
Readers learn from docs, users import the library
✅ Configuration Management
Document your configuration in config.org:
* Database Configuration
We use PostgreSQL with connection pooling.

#+BEGIN_SRC toml :tangle tangled/config.toml
[database]
host = "localhost"
port = 5432
pool_size = 10
✅ Build Scripts
* Build Process

#+BEGIN_SRC makefile :tangle tangled/Makefile
all: build test

build:
	python setup.py build

test:
	pytest tests/
✅ Tangling vs Export
| Feature | Tangling | Export |
|---|---|---|
| Purpose | Extract code to files | Create documentation |
| Output | Source code files | HTML, PDF, LaTeX, etc. |
| Controls | :tangle | :exports |
| Respects | Code blocks only | All org content |
| Use case | Build/run software | Share/publish documentation |
✅ Named Blocks and Calls
✅ Inline Call Syntax
You can also call blocks inline:
The square of 7 is callsquare(x7) {{{results(49=)}}}.
Reference named blocks as variables:
| Name | Value |
|---|---|
| Alpha | 100 |
| Beta | 200 |
| Gamma | 150 |
total = sum(row[1] for row in data[1:])  # Skip header
print(f"Total: {total}")
Total: 450
✅ Call with Headers
Override headers when calling:
121
| 1 |
✅ Library of Functions
Build a library of reusable code blocks:
| 10 |
| 20 |
| 30 |
| 40 |
| 50 |
np.float64(30.0)
np.float64(30.0)
✅ Best Practices
Use descriptive names: load-data, calculate-statistics, generate-plot
Document block parameters in preceding text
Keep blocks focused and reusable
Use #+CALL: for parameterized re-execution
Consider blocks as functions in your literate program
✅ Quick Reference
✅ Essential Keybindings
| Keybinding | Action |
|---|---|
| C- | Execute current block |
| S- | Execute and move to next |
| C- | Previous block |
| C- | Next block |
| C-c C-v t | Tangle all blocks |
✅ Common Header Arguments
| Argument | Values | Purpose |
|---|---|---|
| :results | output, value, table, silent | Output format |
| :exports | code, results, both, none | What to export |
| :session | name or none | Persistent state |
| :var | name=value | Input variables |
| :tangle | filename or no | Extract to file |
| :dir | path | Working directory |
| :cache | yes or no | Cache results |
✅ Supported Languages
Direct: python, javascript, typescript, shell, bash, sql
Jupyter: jupyter-python, jupyter-r, jupyter-julia, jupyter-ruby, and many more
✅ Example Templates
✅ Basic Block
# Your code here✅ Session Block
# Code with persistent state✅ Data Processing
| A | B |
|---|---|
| 1 | 2 |
# Process data
return processed
✅ Tangled Library
def my_function():
    """Documented function"""
    pass
✅ Tips and Best Practices
✅ Organization
Use headings to group related blocks
Name important blocks with #+NAME:
Add #+CAPTION: to blocks that produce key results
Use sessions to connect related blocks
✅ Performance
Use :cache yes for expensive computations
Close unnecessary sessions to free memory
Use :results silent when you don't need output
Limit output size for large datasets
✅ Reproducibility
Specify exact versions in documentation
Use :dir to set working directory explicitly
Document all dependencies in requirements/environment
Include data loading steps in the document
✅ Debugging
Execute blocks one at a time with C-
Check session state in separate test blocks
Use :results output to see print statements
Clear results and re-execute from top to verify
✅ Collaboration
Export to HTML/PDF for non-technical readers (:exports results)
Tangle to source files for developers (:tangle yes)
Use meaningful block names for #+CALL: references
Document assumptions and requirements in text
✅ Common Pitfalls
Forgetting to enable sessions when blocks depend on each other
Using :results value when you want printed output
Not clearing stale results before sharing
Referencing blocks that haven't executed yet
Mixing session names unintentionally
✅ Additional Resources
✅ Emacs Org-Mode Documentation
While Scimax VS Code implements its own version, the Emacs org-mode documentation is valuable for understanding concepts:
✅ Scimax VS Code Docs
✅ Conclusion
Source code blocks transform org documents into powerful literate programming environments. You can:
Write executable documentation
Build reproducible analyses
Create interactive notebooks
Develop software with embedded docs
Share knowledge with working examples
Master the keybindings (C-
Happy literate programming!